One of the hidden expenses and important aspects of the conversion was the glue/adhesive used. Everybody wants their van to be water-tight and if you choose the wrong adhesive, it will eventually fail and lead to a leak appearing at the most inconvenient time. Water has this uncanny ability to find its way into the smallest of gaps at the most unbelievable rate.
There are 5 types of adhesive/sealant we’ve used the van.
- Non-bedding sealant for external stuff like windows, roof vents, water inlet
- Caravan adhesive for internal bonding that needs to cope with flexing and expansion
- Wood glue for some of the carpentry
- Contact adhesive for bonding fabric to surfaces
- Kitchen sealant for worktops and bathroom finishing.
I think we were lucky in discovering O’Leary motorhomes who had a few pallets of caravan adhesive at a really good price. It’s normally quite expensive (cos it’s got a tough job to do), especially when you consider I used about 30 tubes of adhesive and 12 tubes of bedding.
Non Bedding Sealant
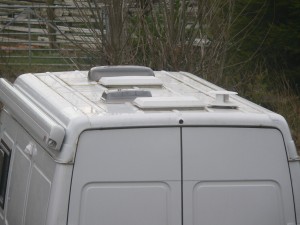
 We used a product called Seamseal CV by Hodgson. It’s a non setting sealant that allows the van to flex and expand at a different rate to the window frame, rooflight, etc. In sun, the van shell will get warm and expand, in winter it gets cold and shrinks. The plastic frames on the skylights, will not grow and shrink as much. If you use a normal caravan adhesive/sealant, the sealant will loose contact at some point and just the tiniest of cracks will suck water into the van through capillary action. It’s not pleasant having a leaking skylight in the van, ignoring all the problems that come later with rust.
Non bedding sealant doesn’t set and it’s very sticky. Basically, if you get some on one finger, it quickly spreads onto everything you touch and it’s not easy to clean off clothes and surfaces.
Tips for use
Clean all surfaces down with meths or car paint surface cleaner, mask off the area and then apply beads to the surfaces you are sealing. If you are sealing roof vents, nobody’s going to see the quality of the finish, so applying more is safer than less. Wear gloves if possible when smoothing down, and concentrate on not touching things if you get some on your fingers. Always have a roll of kitchen paper close by when using this stuff.
Caravan Adhesive
 Good caravan adhesive looks like normal kitchen sealant but with hidden magic strength. Don’t mistake it for the ‘as good as nails’ stuff you can buy at DIY shops like B&Q. You can pay a lot of money for it – but it does have a tough job to do – bonding a wide range of materials to a metal box that gets driven over potholes and left in sunny car parks and frozen forests.
Sikaflex 512 is the famous type people use but gets expensive when you use the amount I did. We used a product called FC40 from O’Leary Motorhomes at nearly half the price.
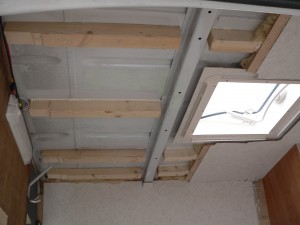
I used caravan adhesive to glue wooden batons to the roof so that we could insulate and avoid cold spots. Nearly everything in the van is bonded with this glue – only smaller carpentry stuff is glued with wood glue as wood glue is quite stiff and unable to cope with stuff that may flex when the van is being driven.
Tips for use
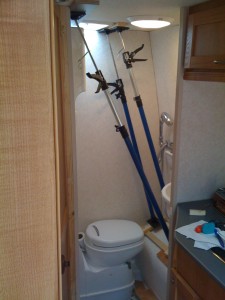
 Clean all surfaces with meths or car paint surface preparation cleaner. Make sure you read the instructions on the glue about temperature ranges for use. Van conversion is a summer hobby as you want the glue to set correctly. Be careful of trapping moisture into voids if you are working in autumn on the van, as the van cools, condensation forms and is a potential rust/rot time bomb. Buy some props from B&Q to help you hold stuff in place when leaving glue to set. Have some patience and plan structural glueing jobs so they have time to set over night.